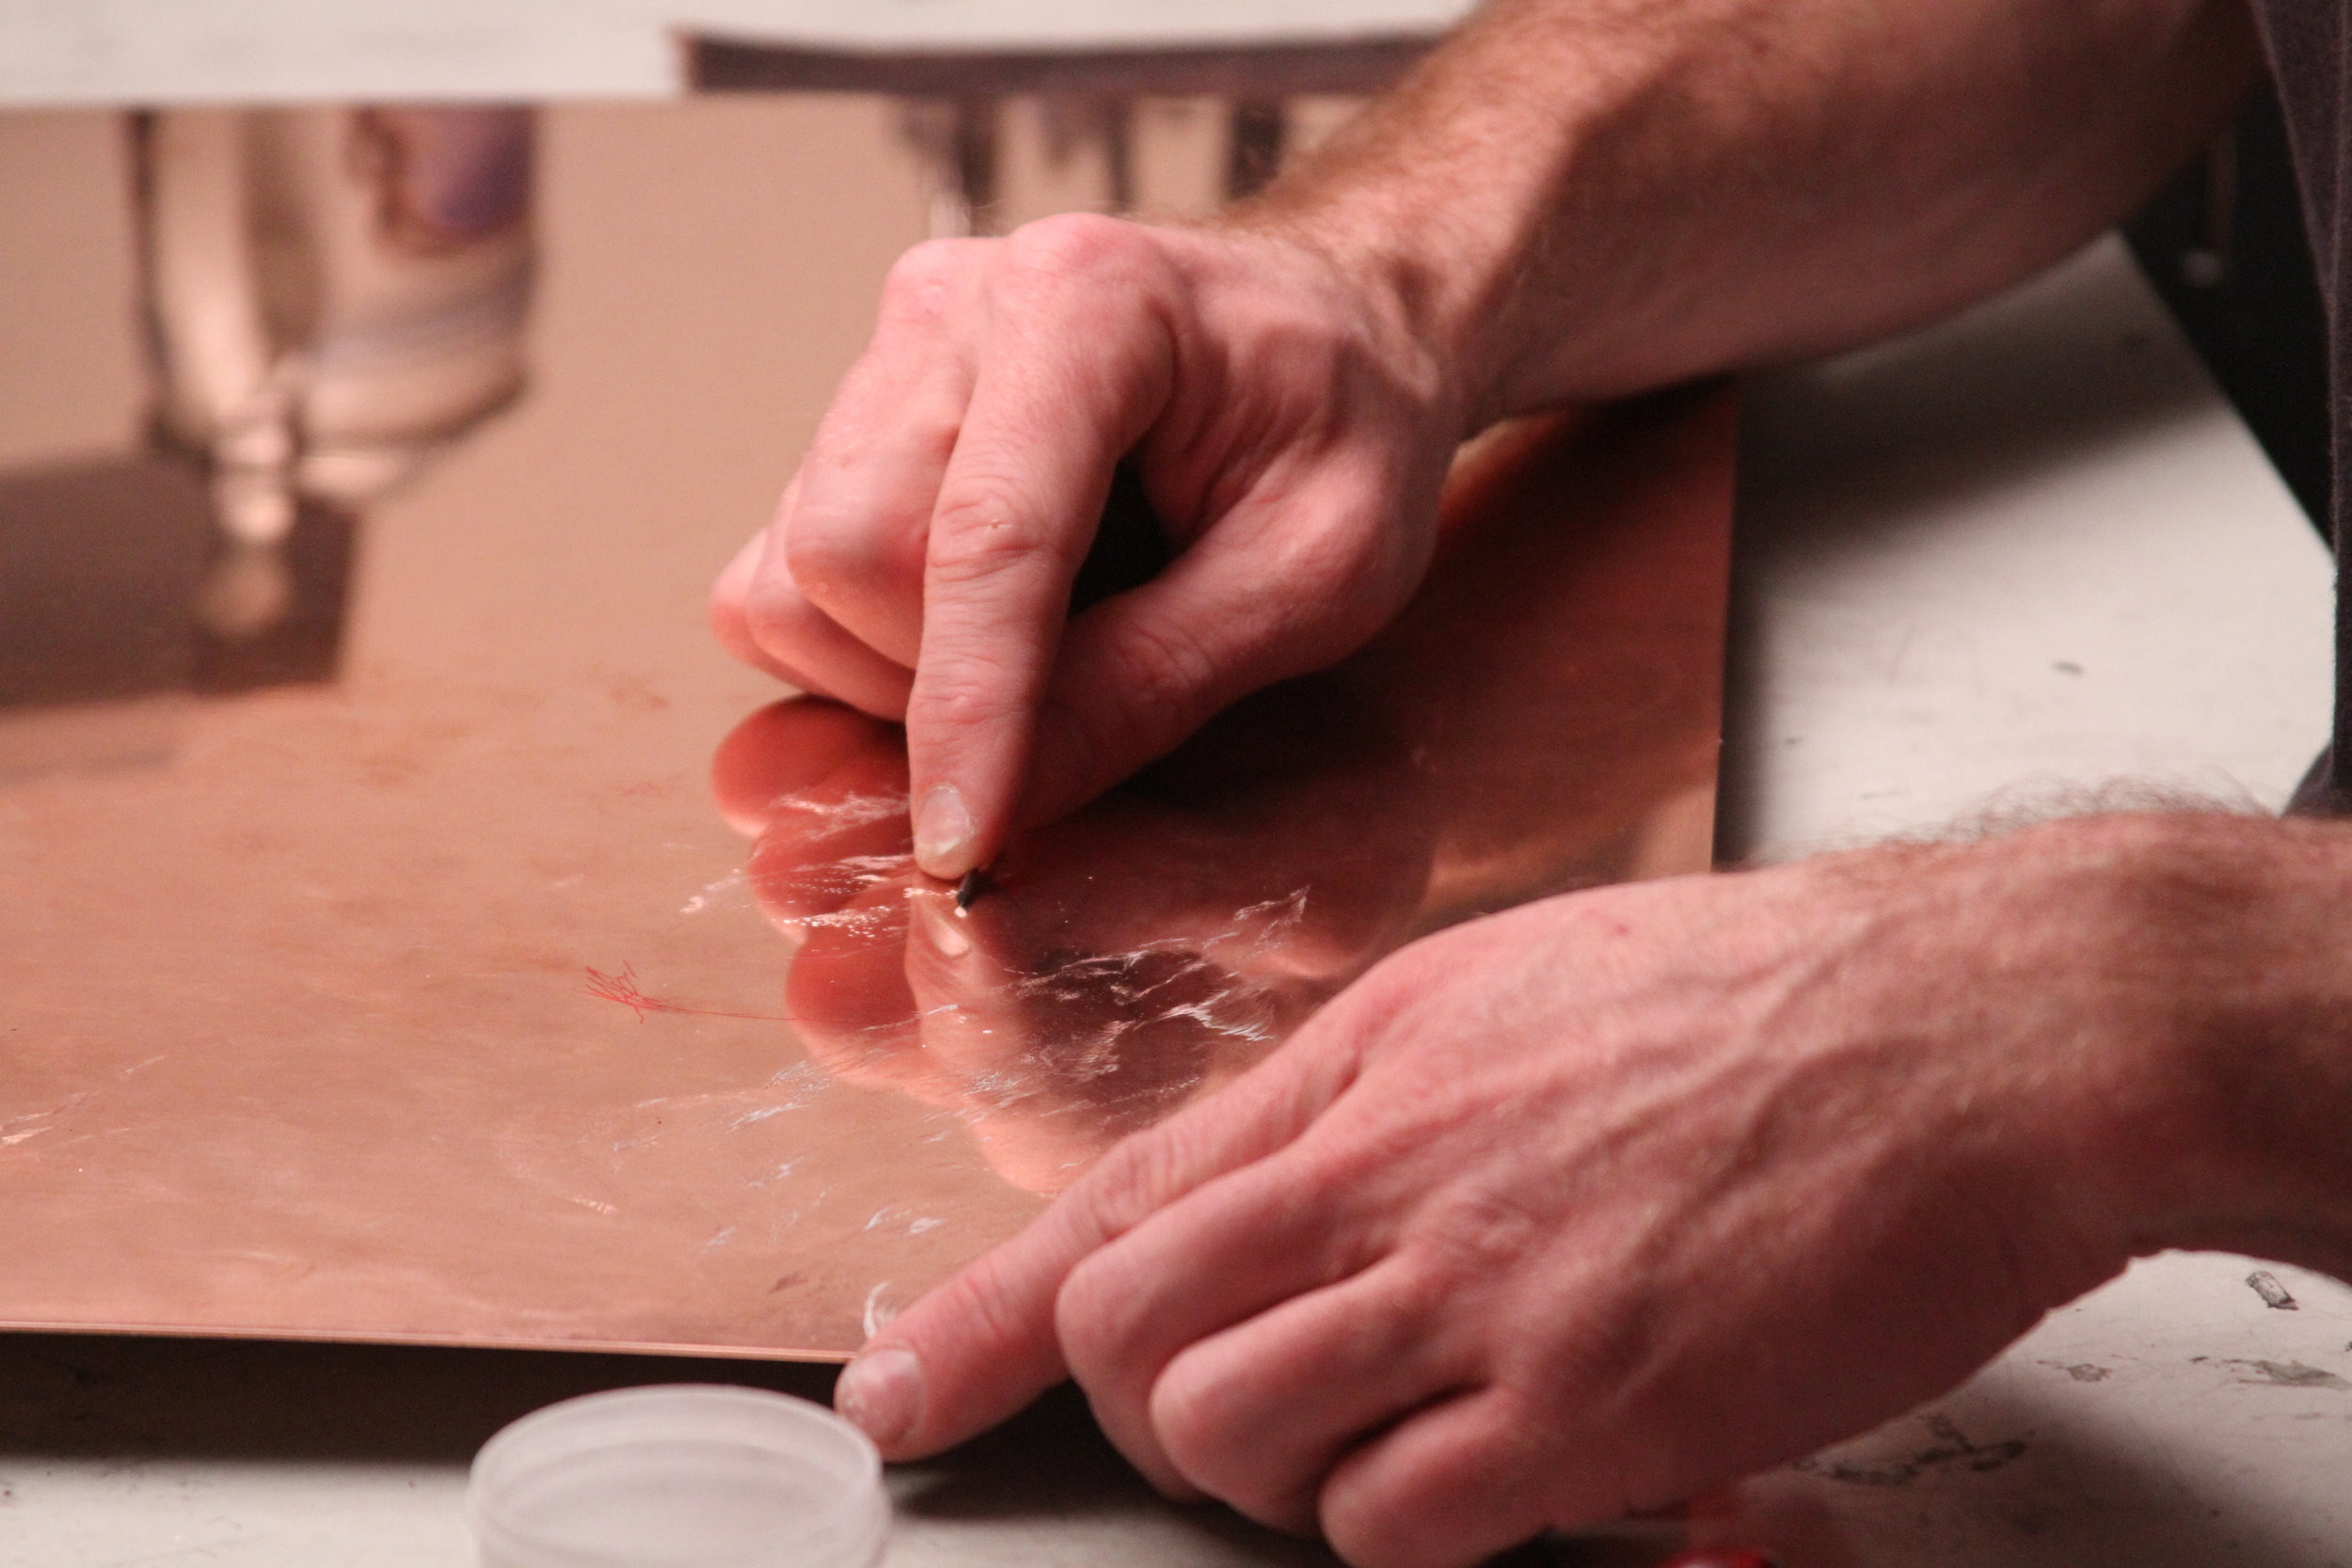
A copper plate is incised with a burin, a steel shaft fixed to a wooden handle nestled into the artist's palm. The copper gouged out of the plate creates the fine lines of each print.
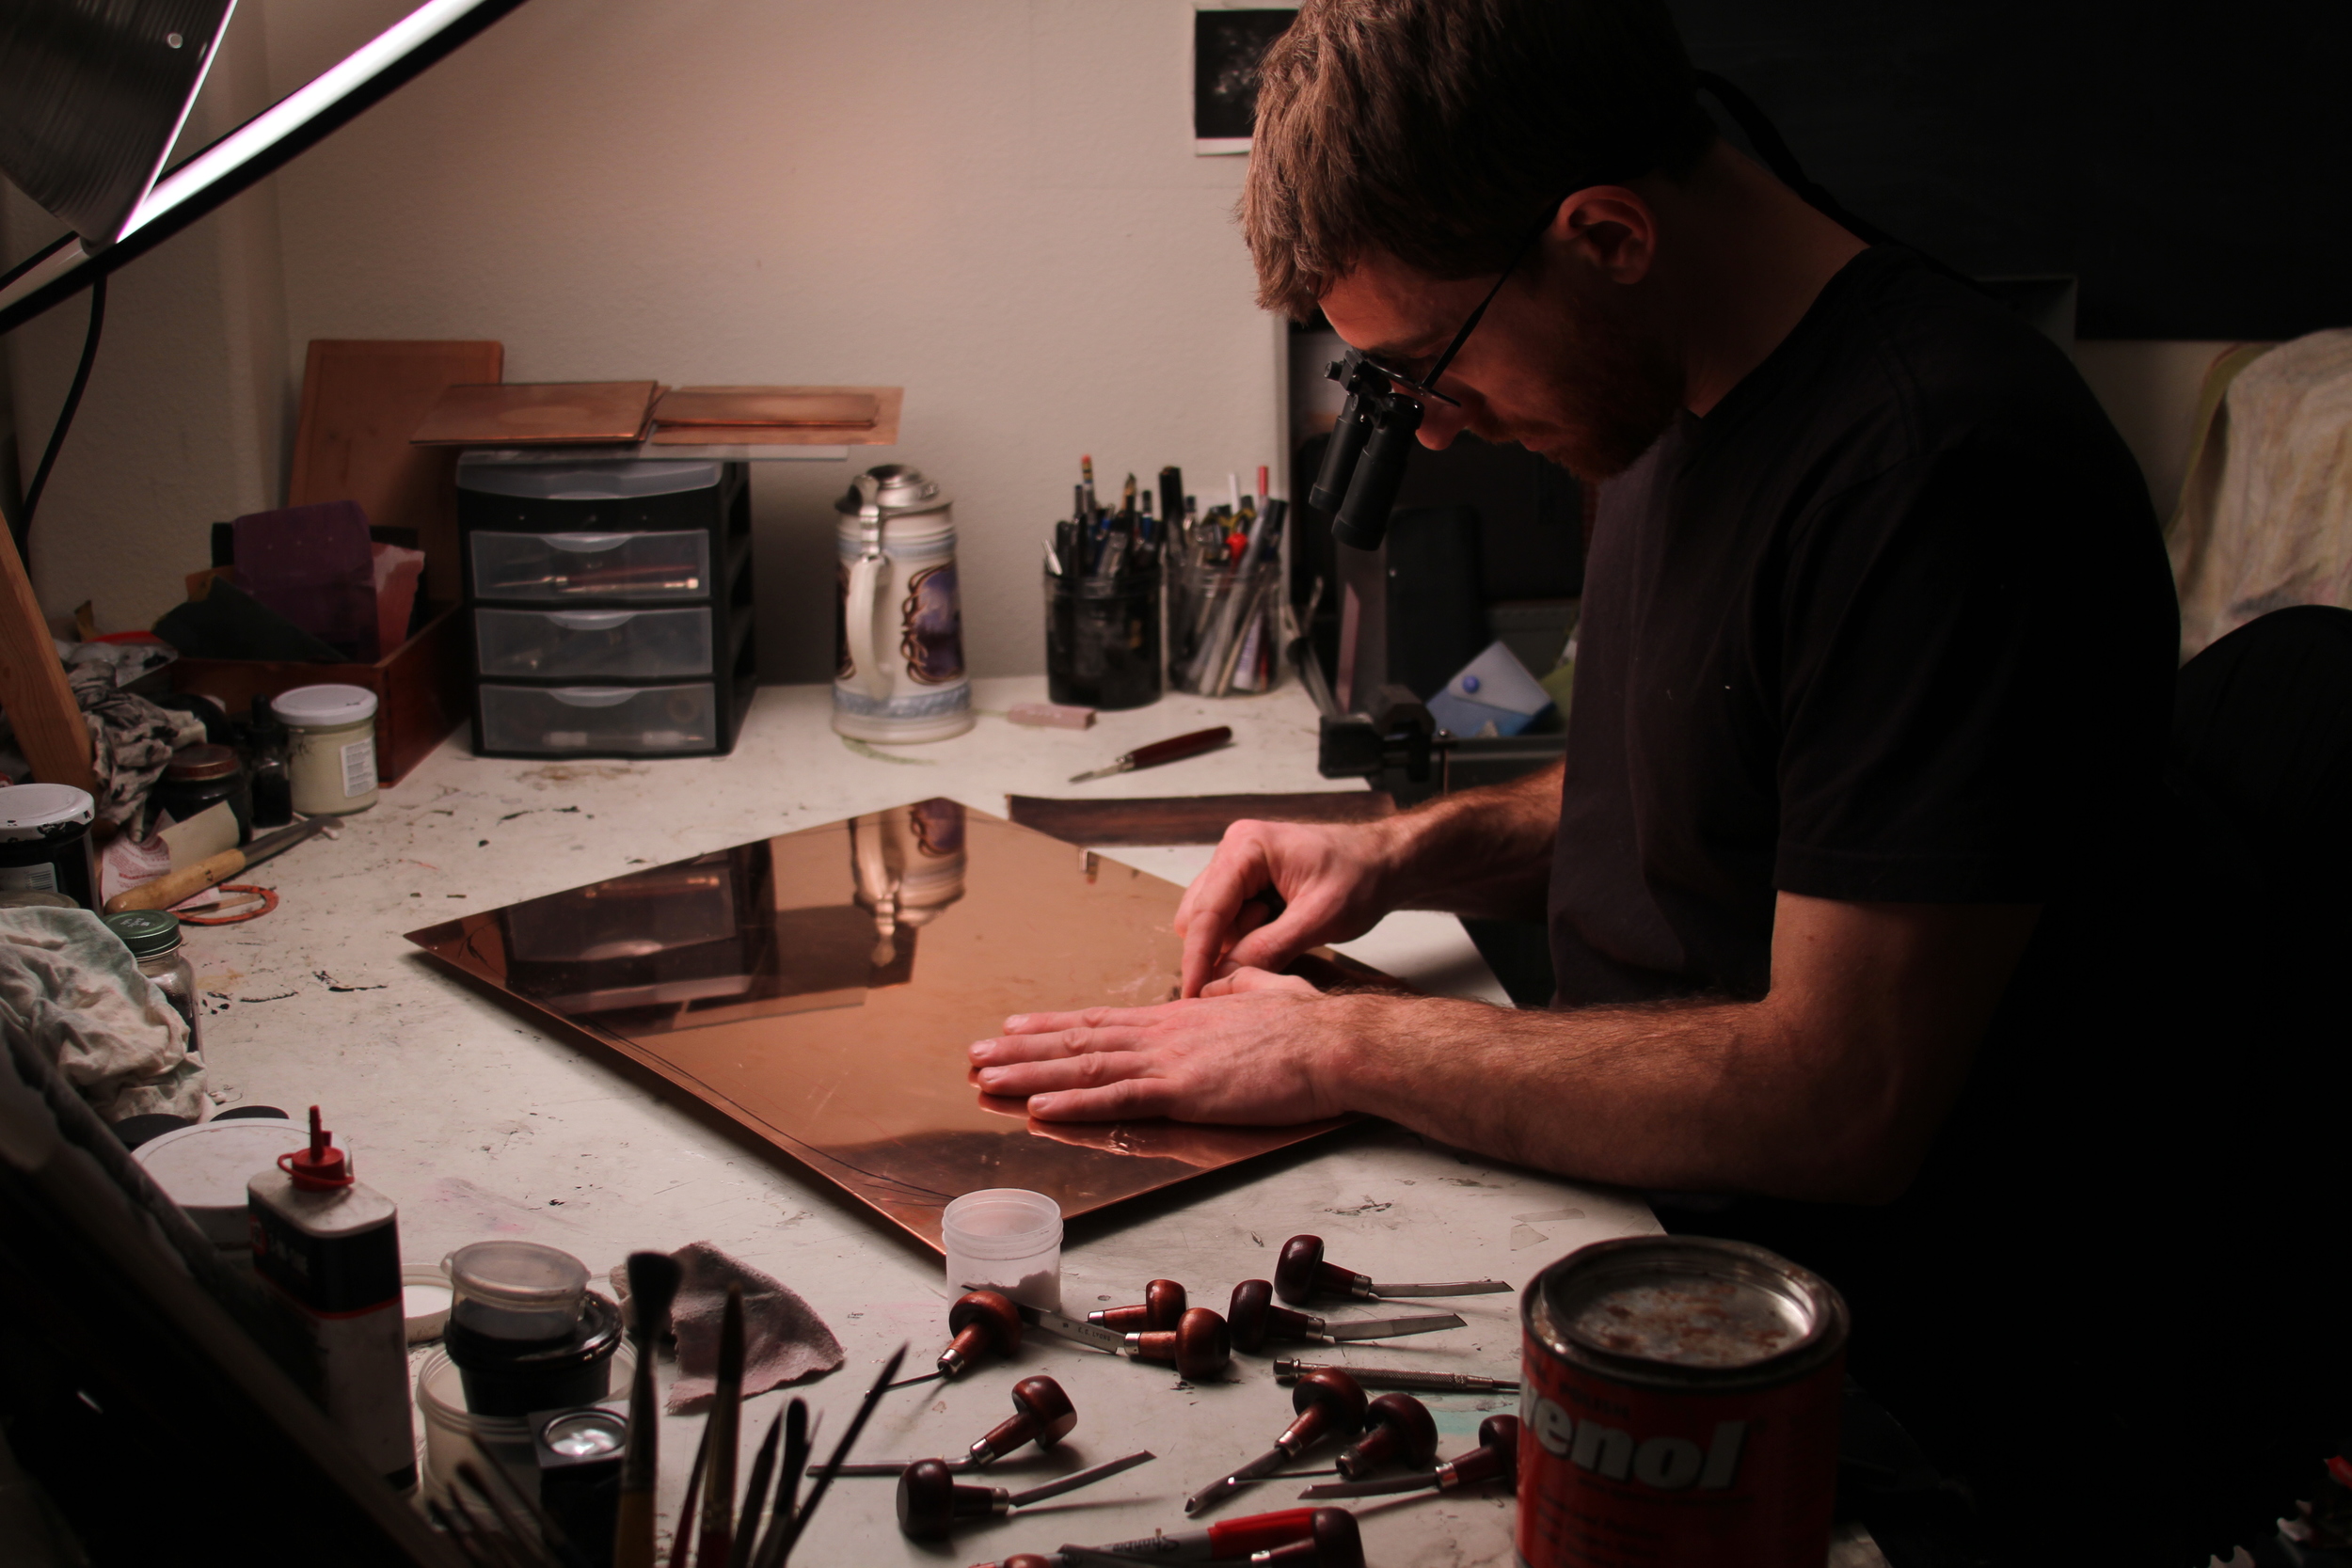
Magnification is often used in order to enhance the detail fine line quality of engraved work. Here I am using a set of dentist's loupes with 6x magnification at a 13" distance.
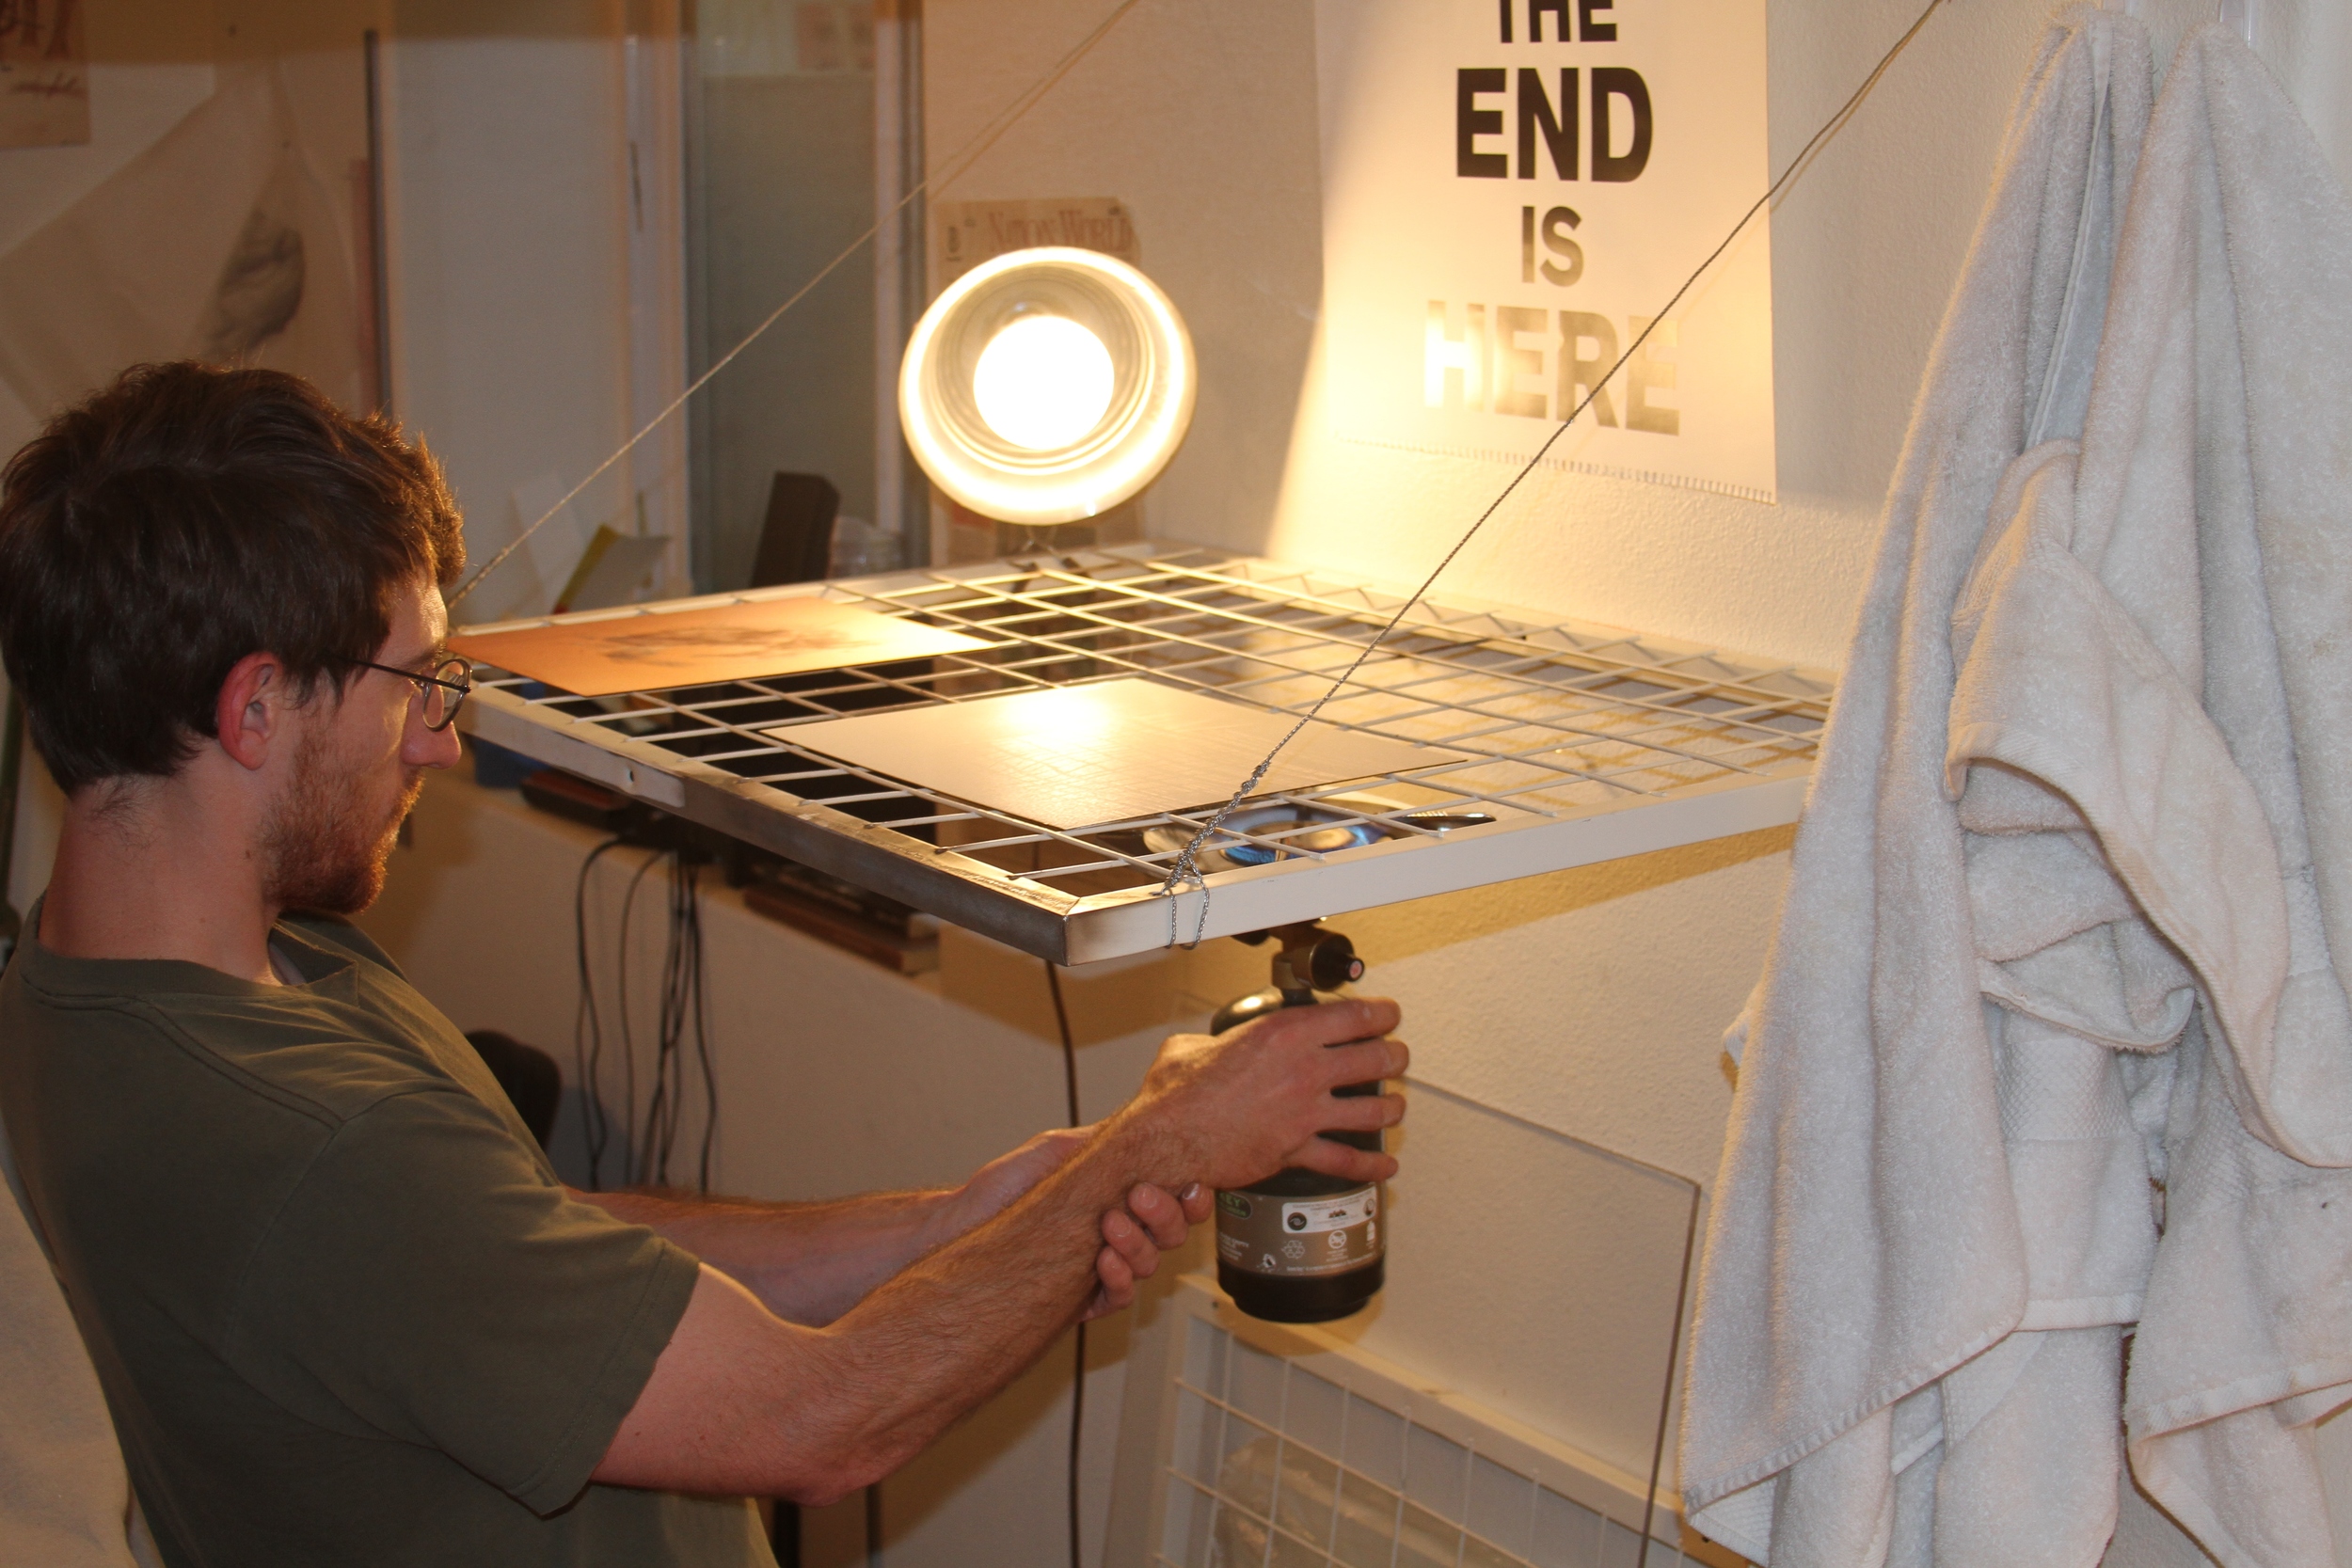
A fine layer of pine rosin is applied to the copper plate via an aquatint box. Once the tiny particles are melted on the plate, they will act as an even resist in the acid bath used to etch fields of grey and black.
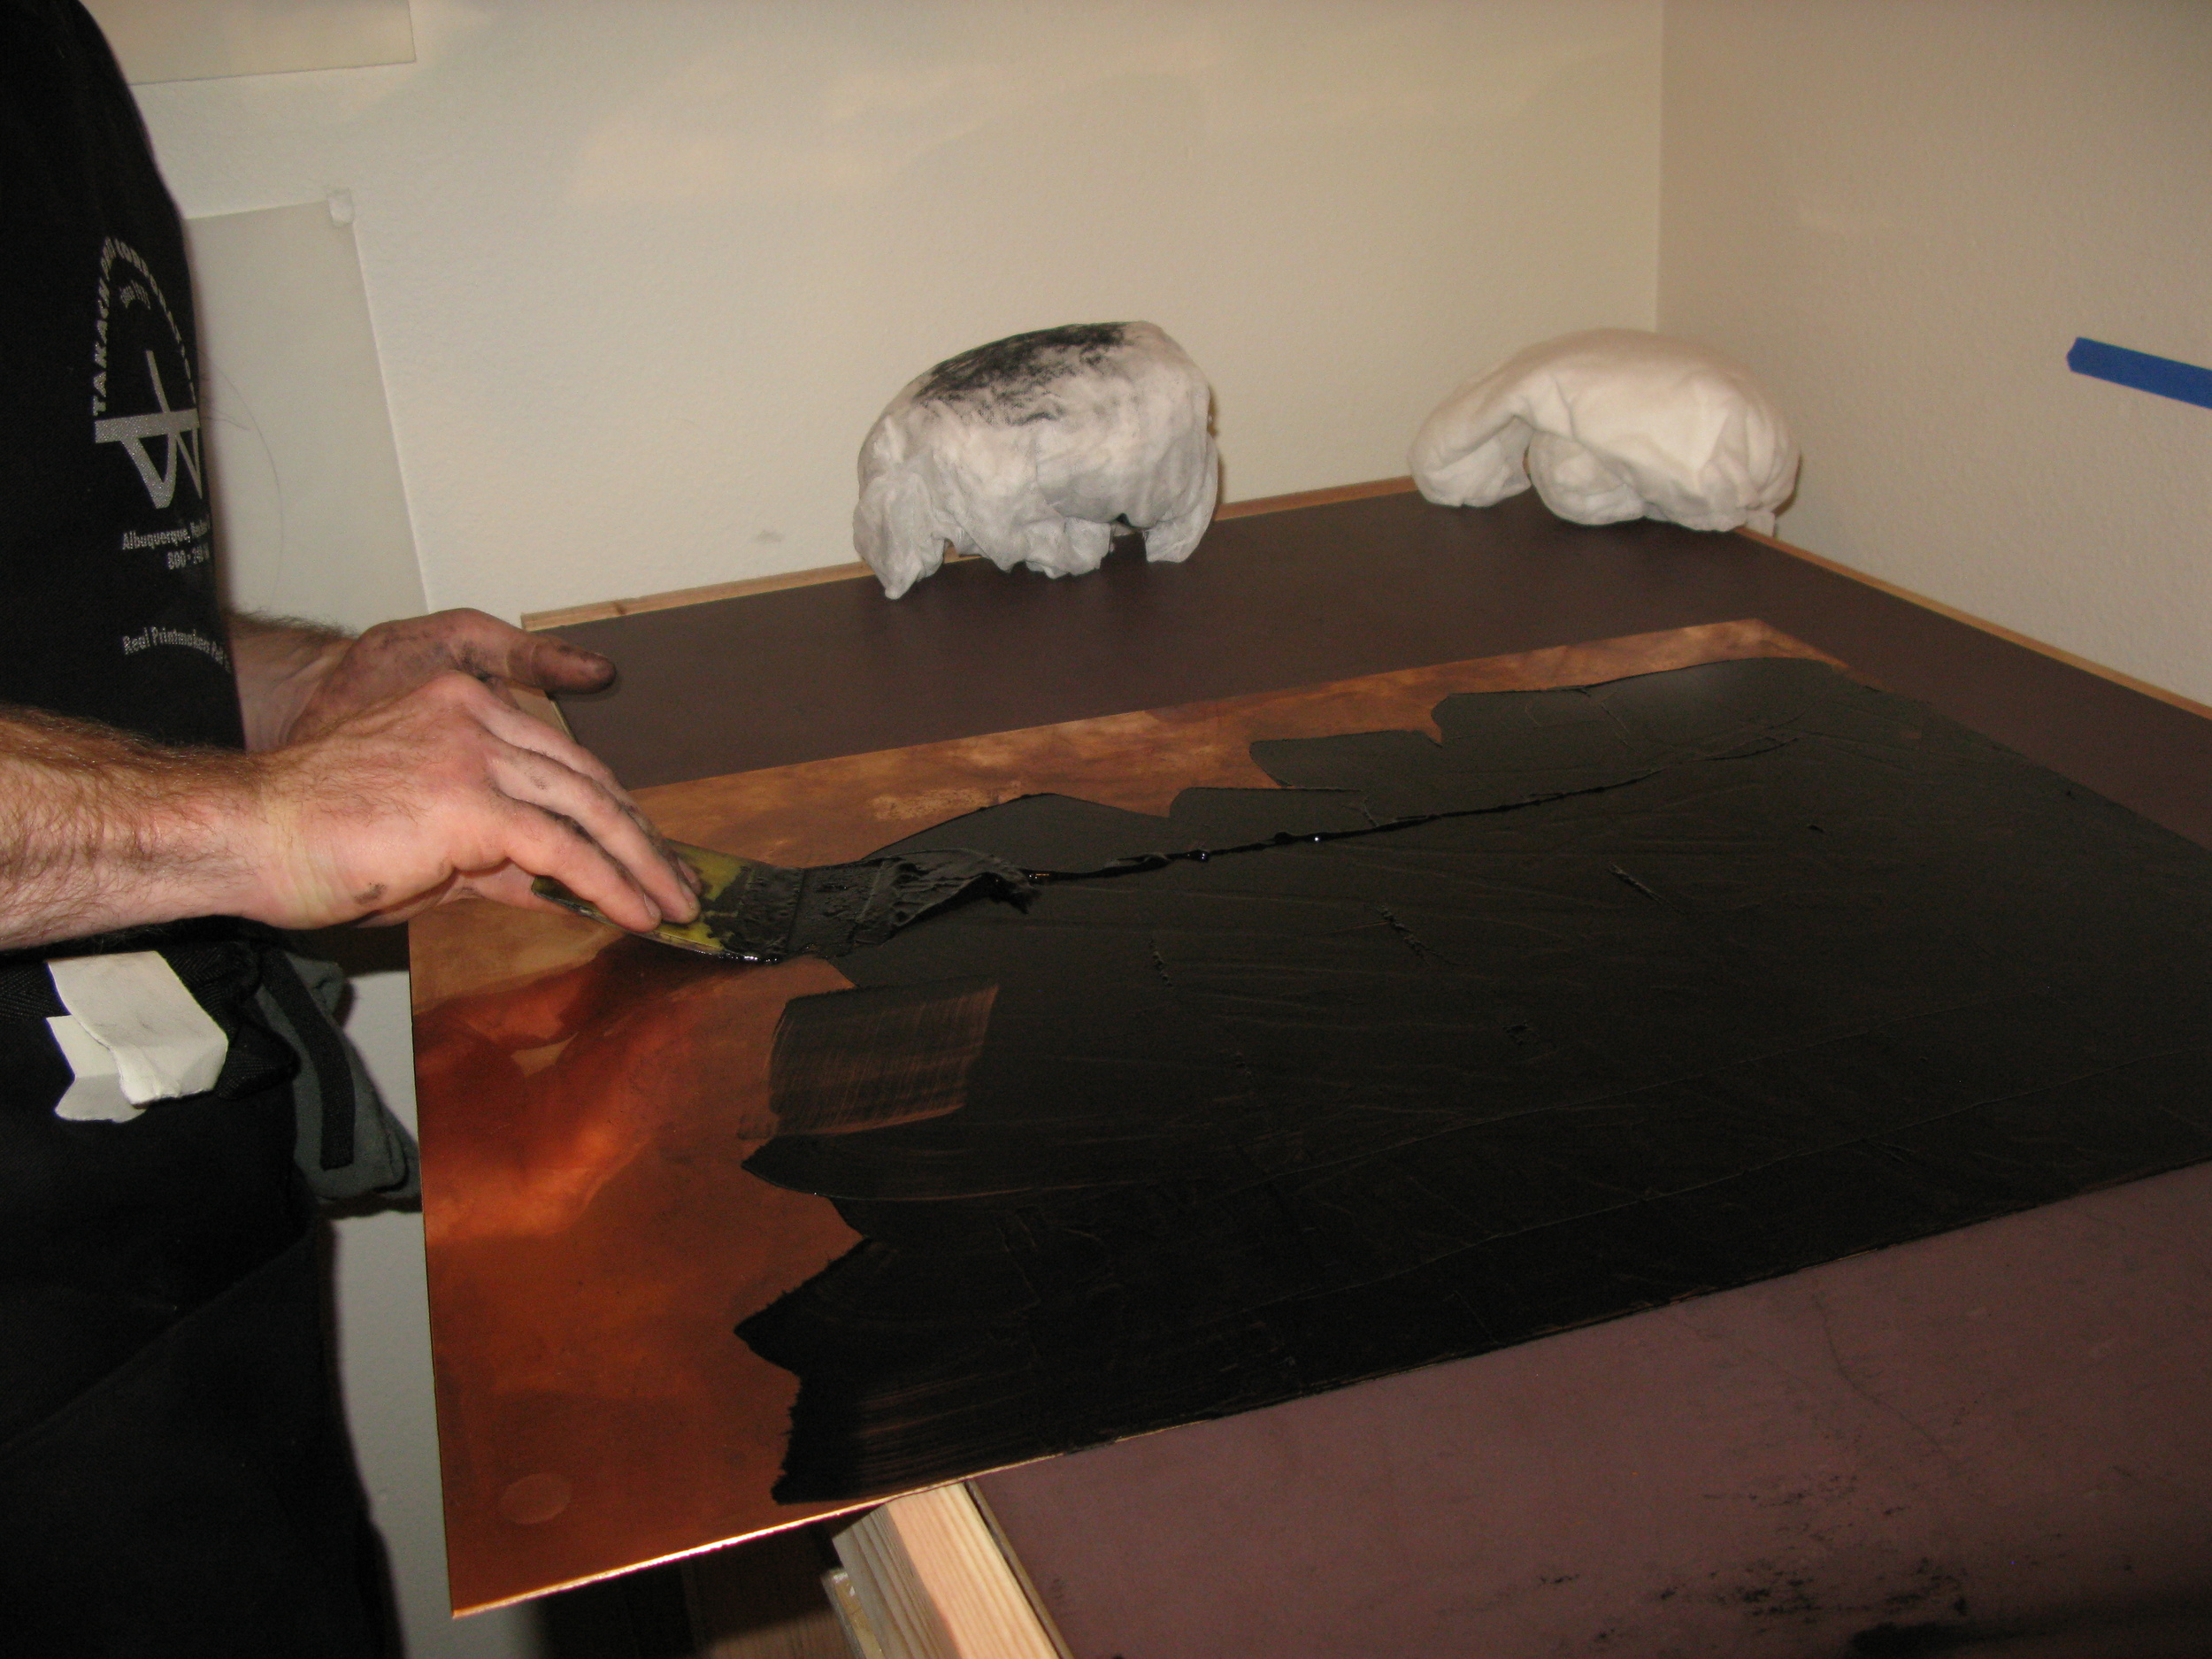
Once the plate is etched and or engraved, Oil based etching ink is applied with a plastic card. The goal is to make sure the ink is deeply within every etched and engraved crevasse created in the plate making process. This ensures the best image can be pulled when the plate hits the press.
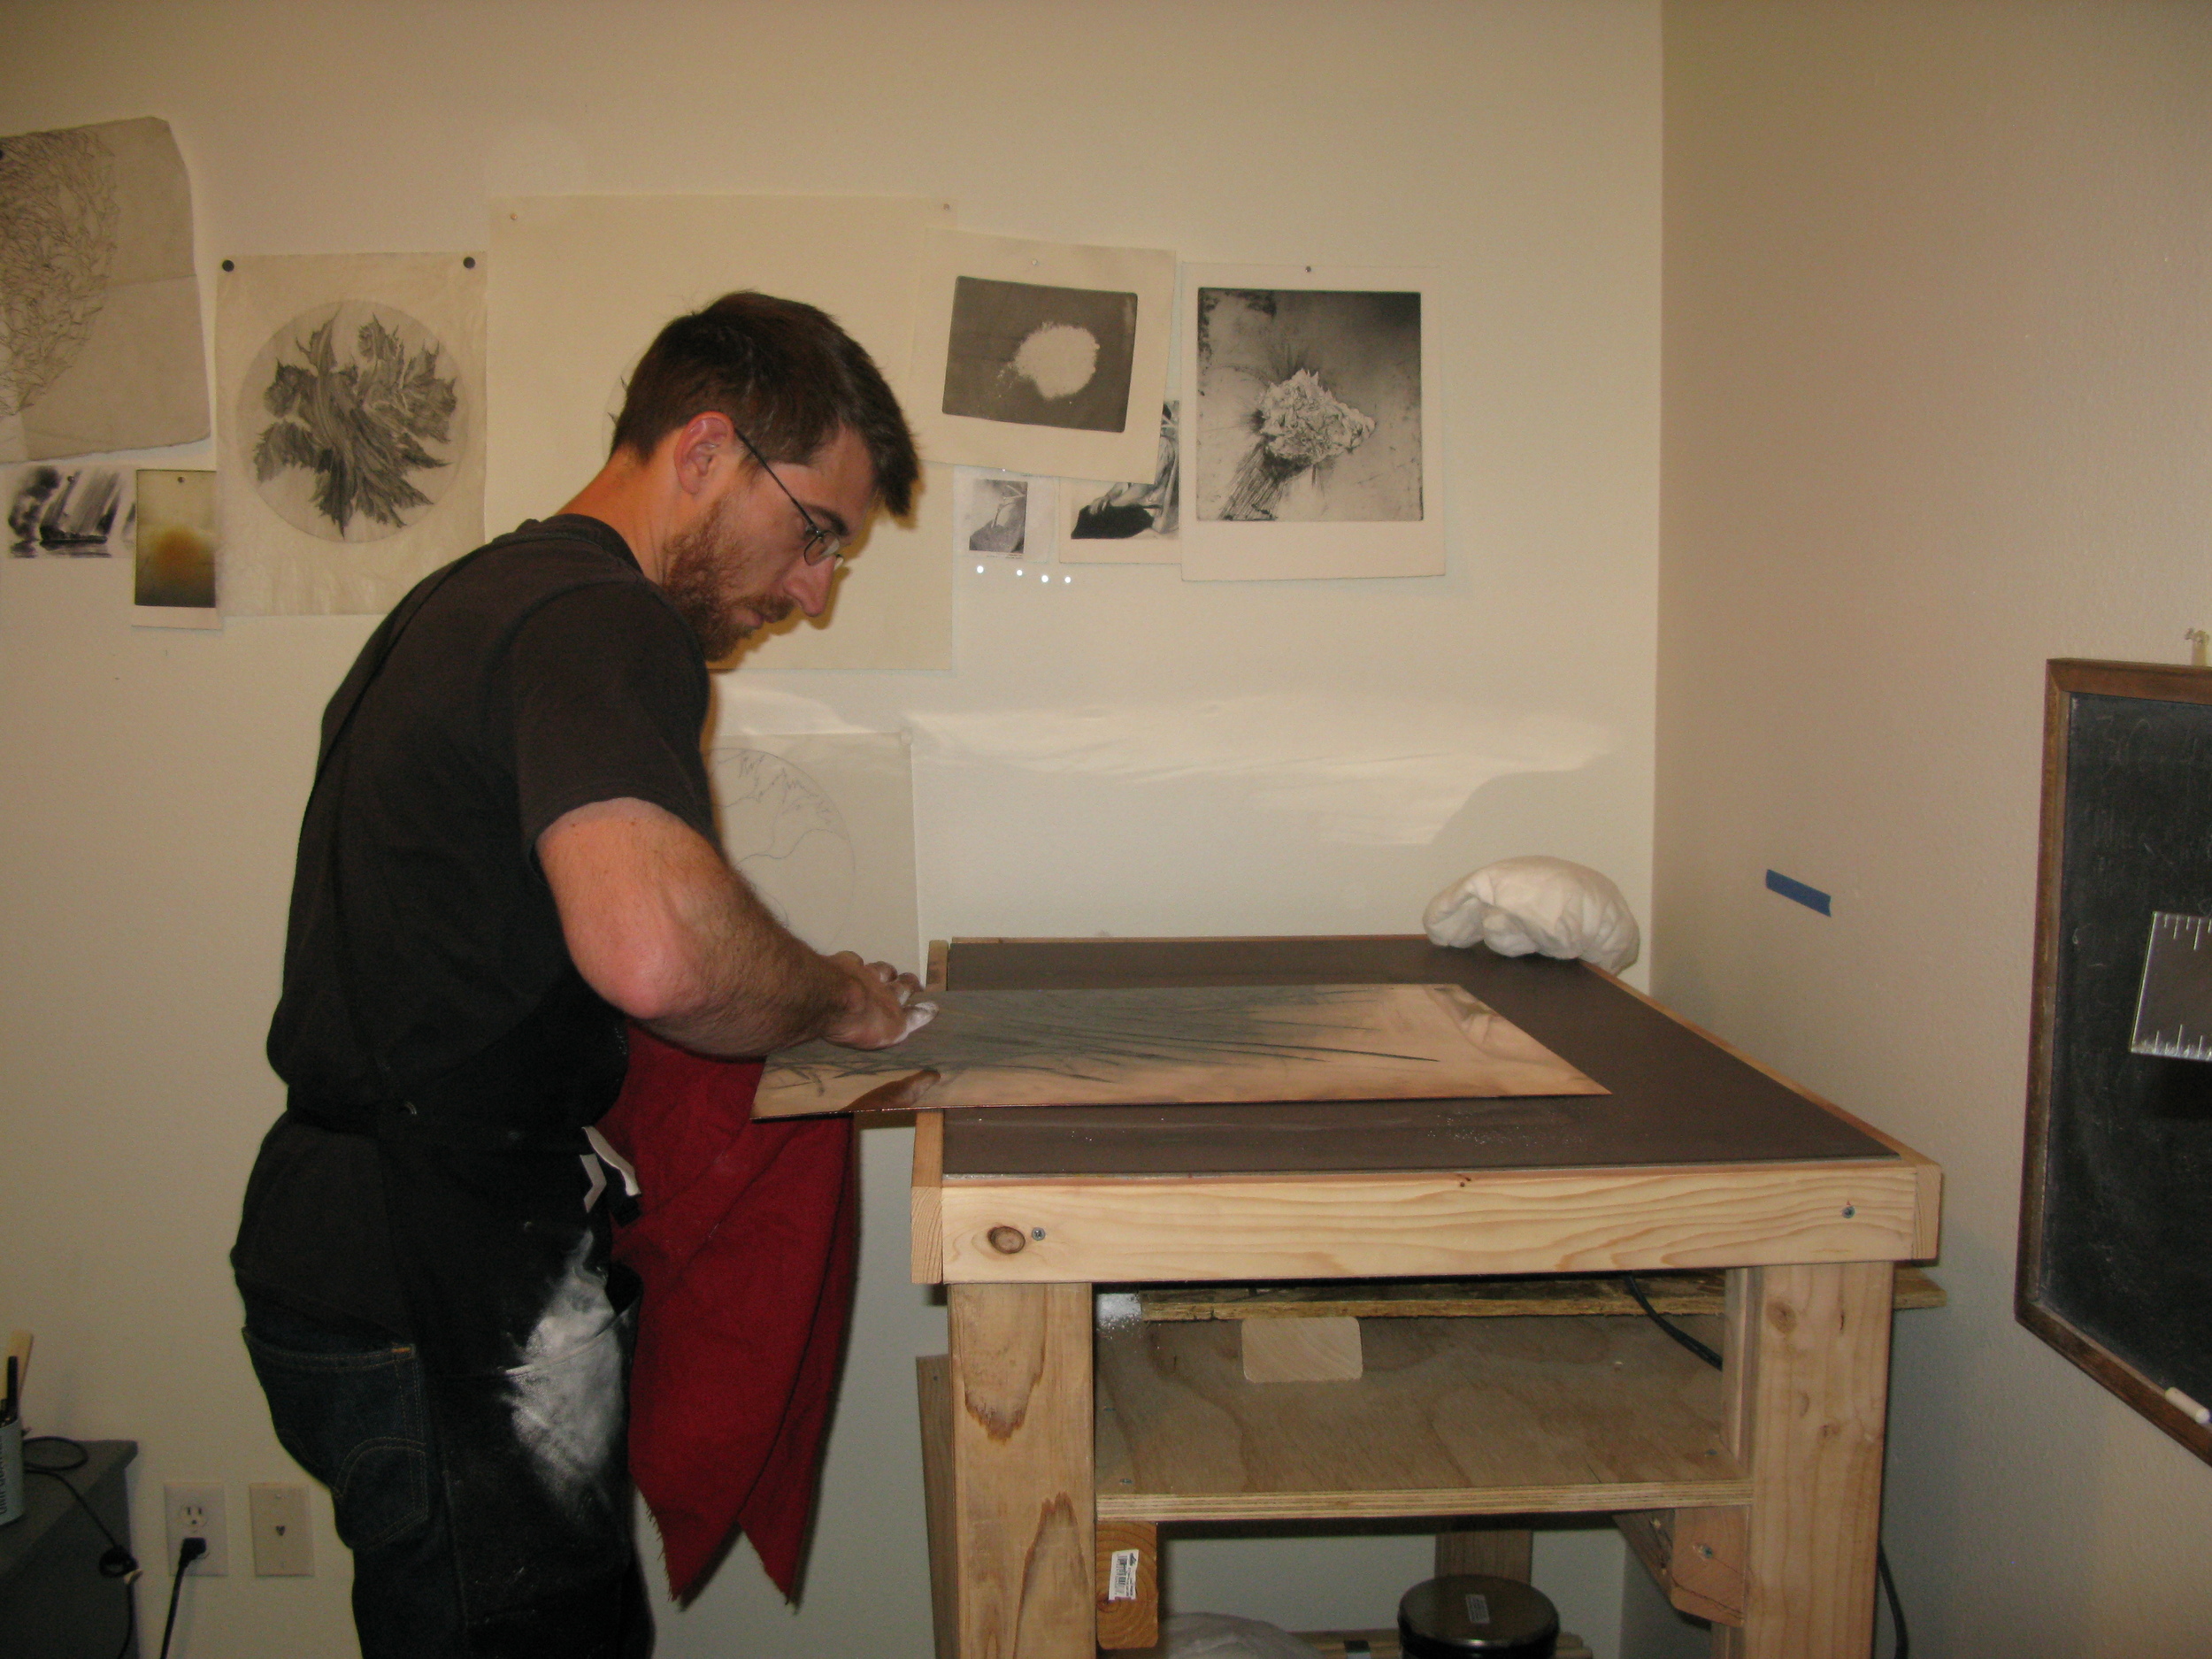
When the ink is in every nook and cranny of the plate, it is time to wipe the excess away, first with a cheee-cloth like material called Tarlatan, then with the palm of the hand to ensure every errant bit of ink is wiped away so the best print can be pulled.

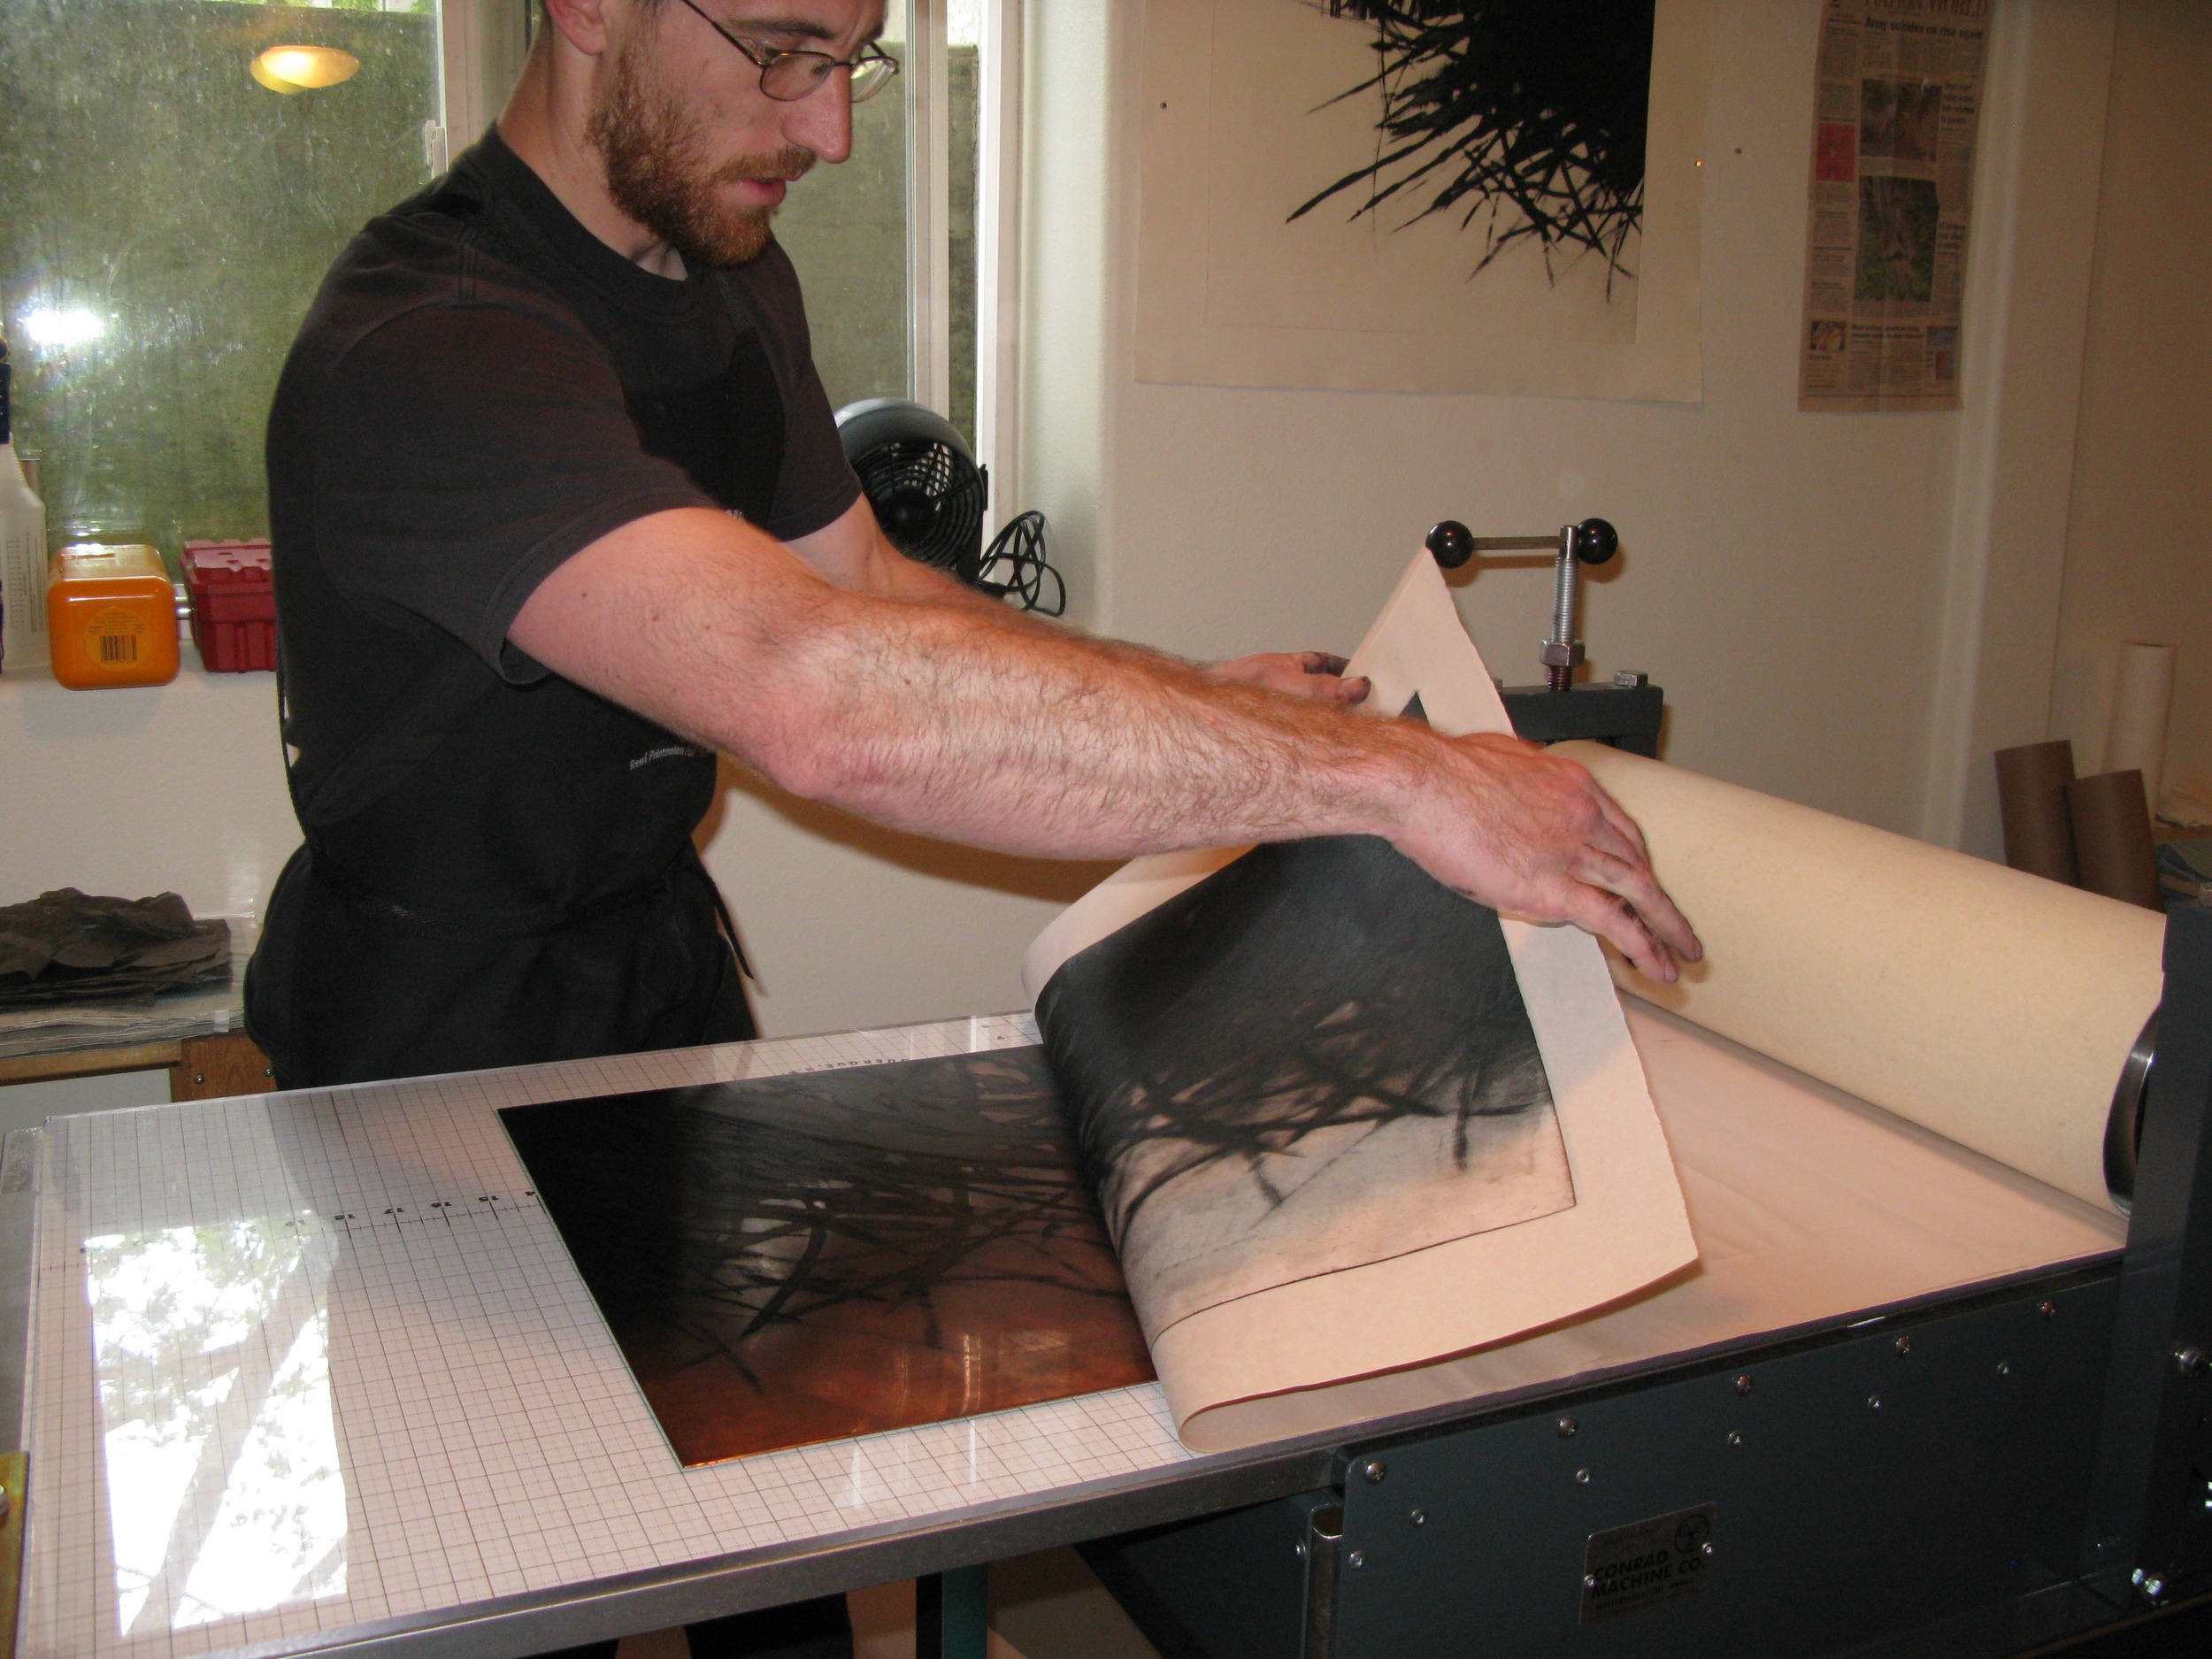
Heavy printmaking paper is prepared as the inked plate is put on the press bed. Once the plate and paper are in good alignment, both are rolled through the etching press and proofed by the pressure of the press' roller.
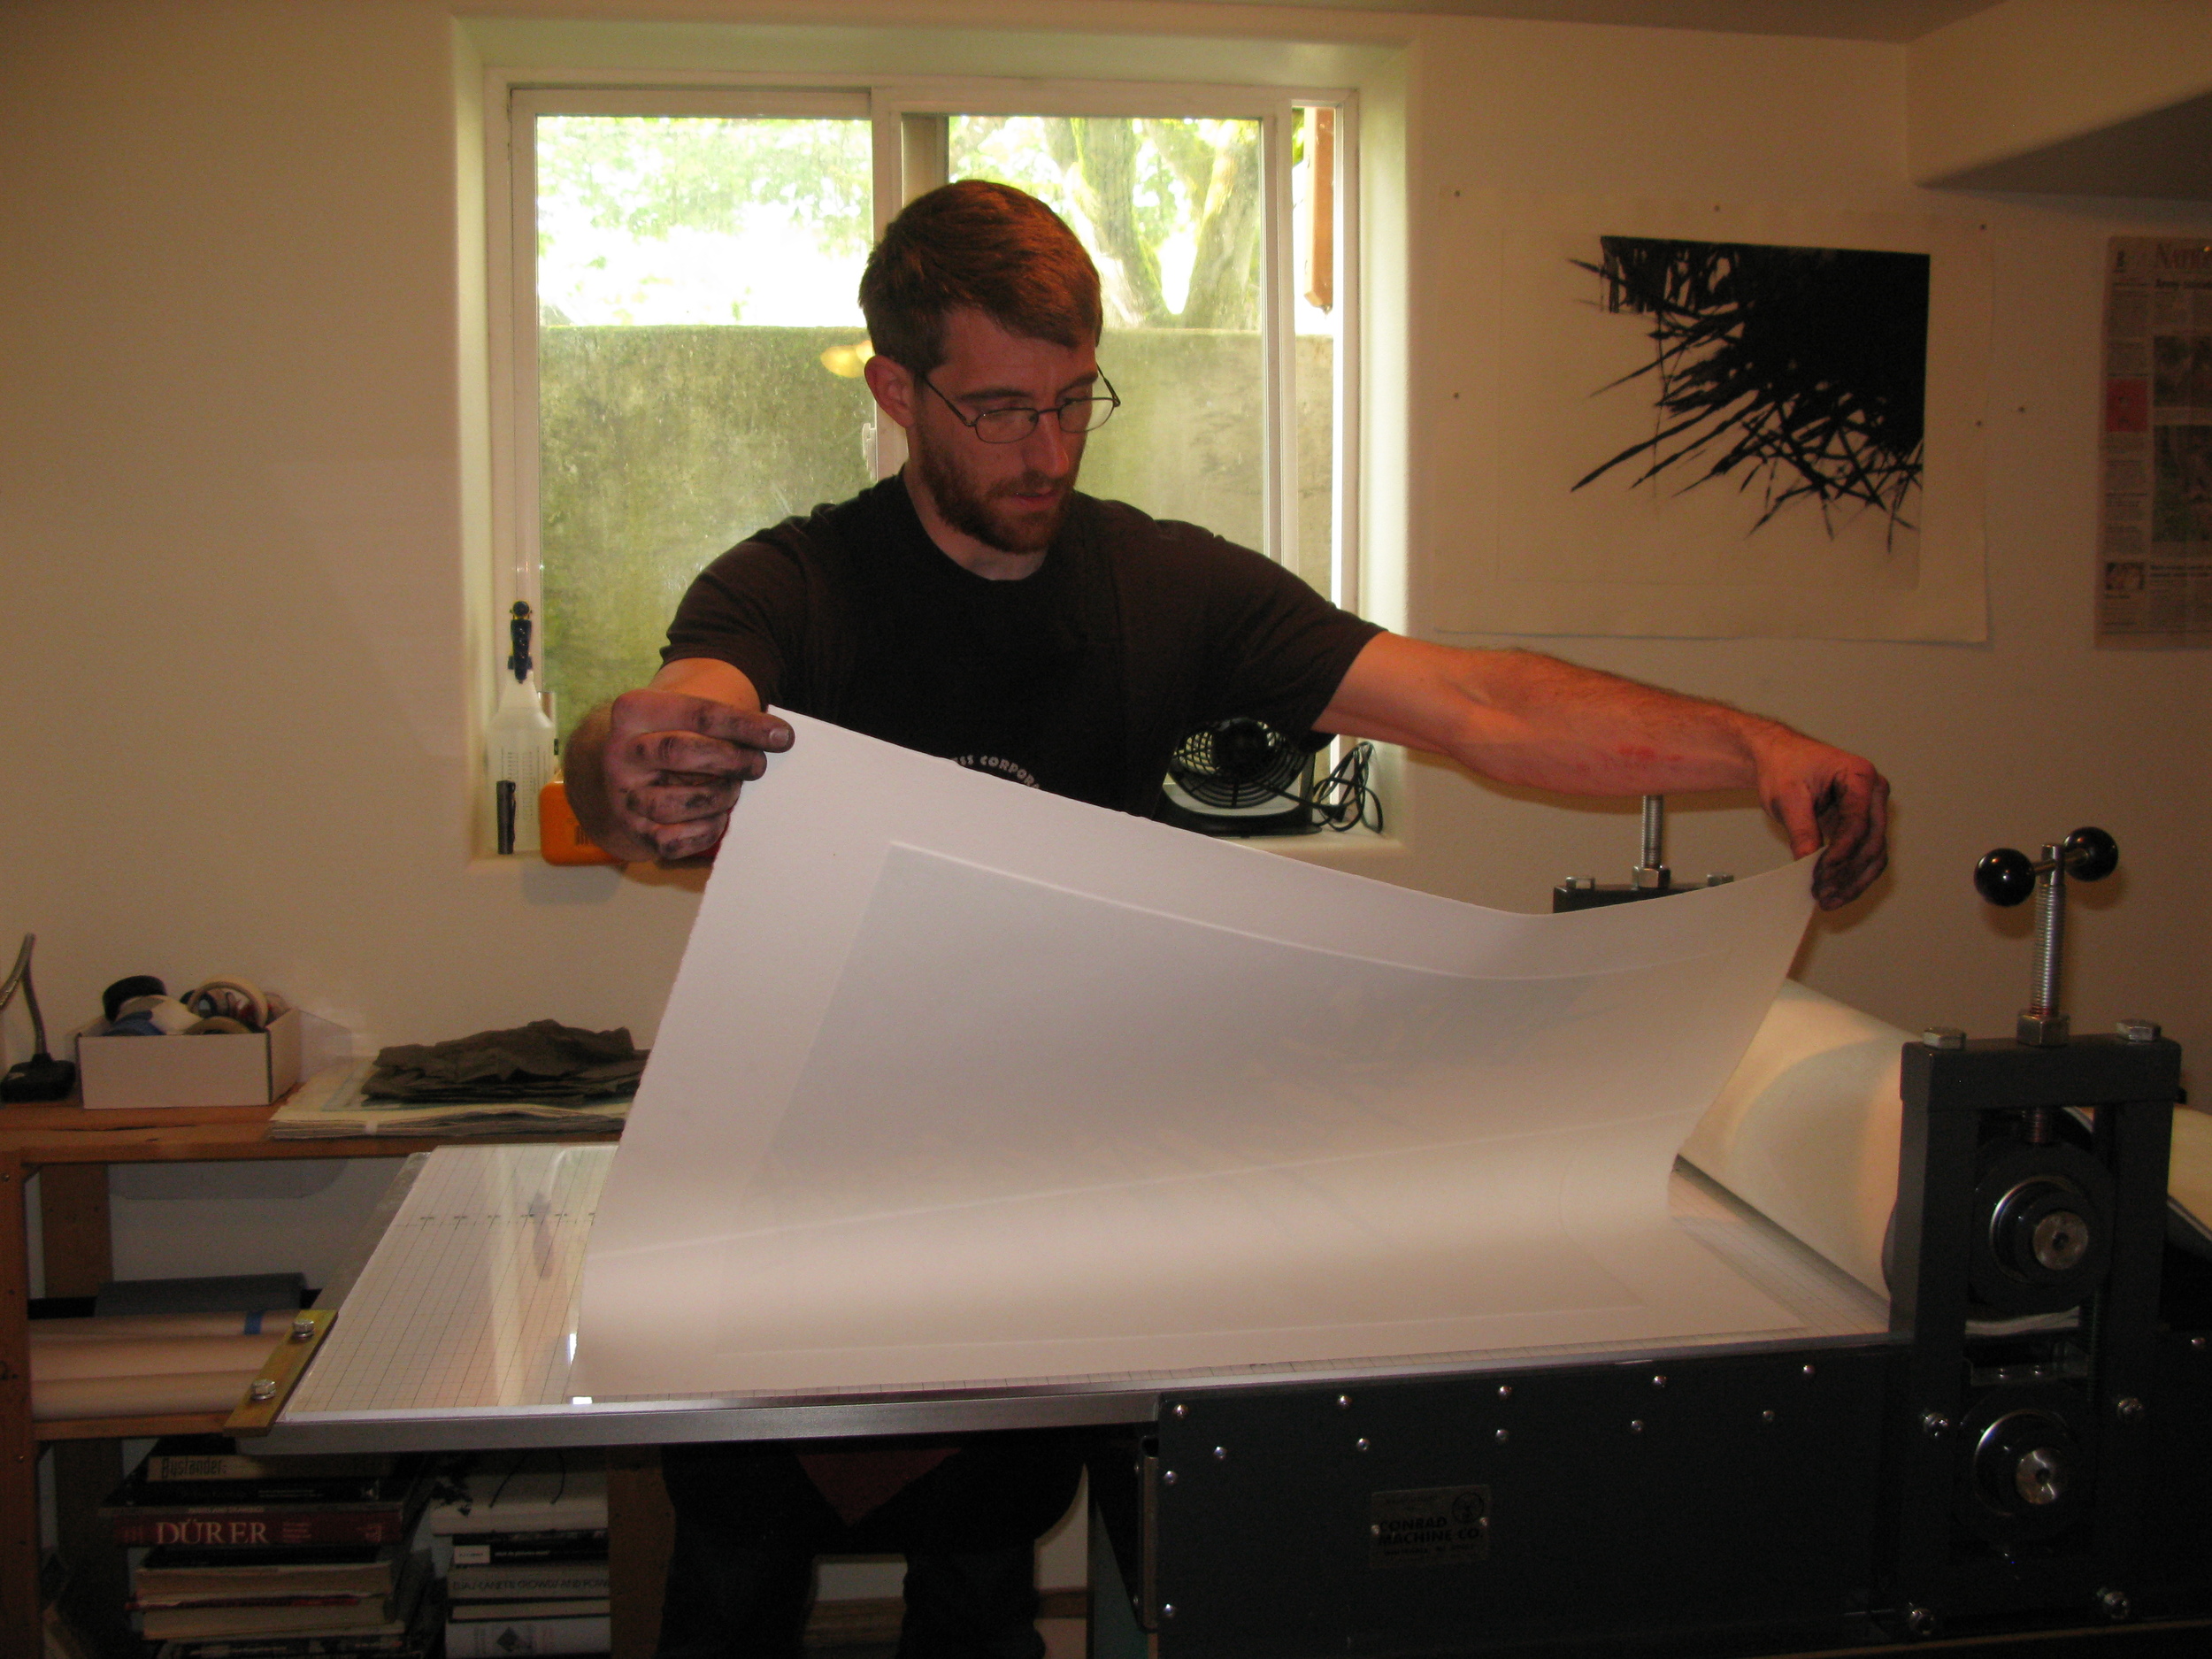
The 1500lbs/in of pressure exerted from the press marries ink to paper and creates the print.
Finally the print is inspected for quality of line and tone, to see if the ink needs to be modified to the demands of the plate, or if the paper is in need of more or less moisture.